

Converting Your Wood Burning Fire Pit to a Gas Fire Pit: A Comprehensive Guide
Posted by The Fire Pit Store on 21st Feb 2024
Fire pits are a quintessential element of outdoor living spaces, offering warmth, ambiance, and a focal point for gatherings. While traditional wood burning fire pits have their charm, many homeowners are opting to convert them to gas fire pits for convenience, cleanliness, and efficiency. Converting your wood burning fire pit to a gas fire pit is a project that can enhance your outdoor experience and provide a hassle-free way to enjoy the beauty of a fire. In this comprehensive guide, we will walk you through the steps to successfully convert your wood-burning fire pit to a gas fire pit.
Understanding the Basics
Before diving into the conversion process, it's essential to understand the fundamental components of a gas fire pit:
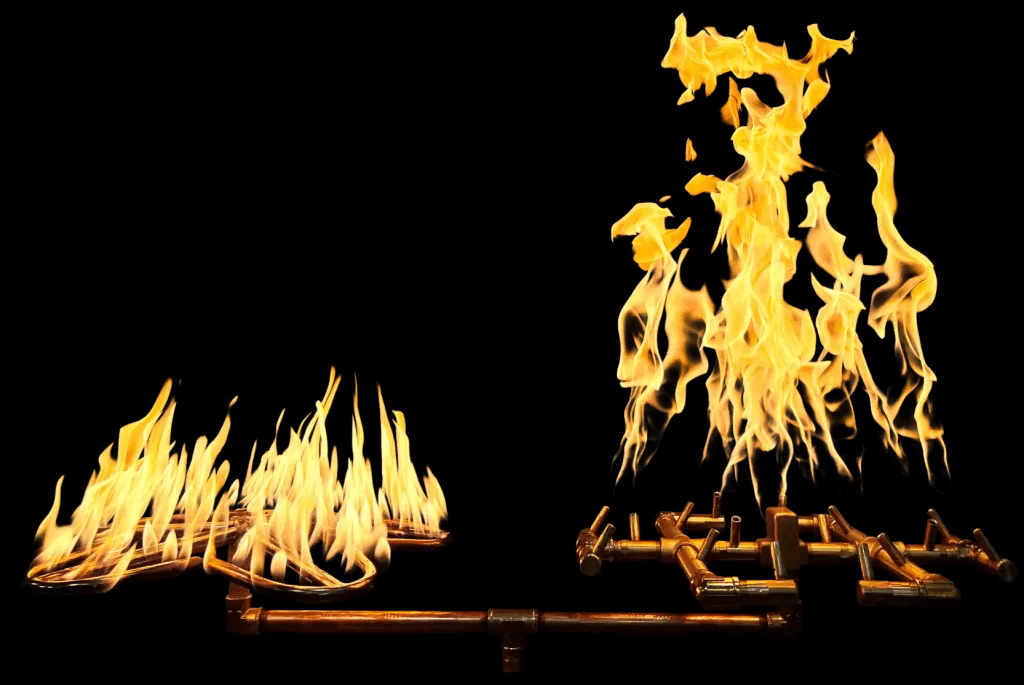
- Burner: The burner is the heart of the gas fire pit, responsible for producing flames. It comes in various shapes and sizes, including round, square, linear, and custom designs.
- Gas Source: Gas fire pits can be fueled by either natural gas or propane. Natural gas requires a permanent connection to a gas line, typically installed by a professional. Propane, on the other hand, is stored in tanks and offers more flexibility in placement.
- Ignition System: Gas fire pits can have manual or electronic ignition systems. Manual systems require a match or lighter to ignite the flames, while electronic systems feature push-button or remote-control ignition for added convenience.
- Safety Features: Gas fire pits should include safety features such as flame sensors, thermocouples, and gas pressure regulators to ensure safe operation and prevent accidents.
Now that you understand the basic components let's delve into the step-by-step process of converting your wood-burning fire pit to a gas fire pit.
Step 1: Assess Your Fire Pit
Before beginning the conversion process, carefully assess your existing wood-burning fire pit to determine if it's suitable for conversion. Consider the following factors:
- Size and Shape: Ensure that your fire pit is large enough to accommodate a gas burner and has a shape conducive to gas fire pit installation.
- Material: Check the material of your fire pit. Gas fire pits are compatible with various materials, including metal, stone, and concrete.
- Condition: Assess the overall condition of your fire pit. Ensure that it's structurally sound and free of any damage that could affect the conversion process.
Step 2: Choose Your Gas Source
Decide whether you want to use natural gas or propane as the fuel source for your gas fire pit. Consider the following factors when making your decision:
- Accessibility: If your property has a natural gas line, opting for a natural gas fire pit can provide a convenient and cost-effective fuel source. However, if natural gas is not available or accessible, propane offers a portable alternative that doesn't require a permanent gas line connection.
- Cost: Compare the cost of installing a natural gas line versus purchasing propane tanks and refilling them as needed. Consider long-term fuel expenses and maintenance costs associated with each option.
- Flexibility: Propane offers greater flexibility in fire pit placement since it doesn't require a fixed gas line connection. This can be advantageous if you plan to rearrange your outdoor space or move the fire pit to different locations.
Once you've chosen your gas source, proceed to the next step.
Step 3: Gather Materials and Tools
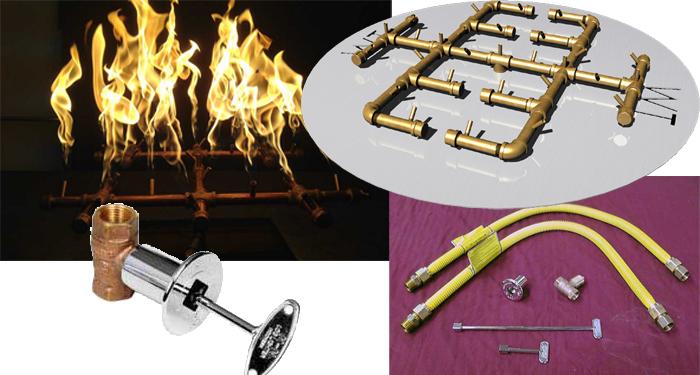
Before you can begin the conversion process, gather all the necessary materials and tools. Depending on the specifics of your project, you may need the following items:
- Gas burner kit (including burner, burner pan, and gas supply line)
- Gas valve and key (if not included in the burner kit)
- Flexible gas line (if using propane)
- Gas regulator and fittings
- Ignition system (manual or electronic)
- Fire pit media (such as lava rocks, fire glass, or ceramic logs)
- Adjustable wrench
- Pipe wrench
- Pipe thread sealant
- Gas leak detector solution
- Measuring tape
- Safety goggles and gloves
Ensure that you have everything you need before proceeding to avoid delays during the conversion process.
Step 4: Prepare the Fire Pit
Prepare your wood-burning fire pit for conversion to a gas fire pit by following these steps:
- Clean the Fire Pit: Remove any debris, ashes, or leftover wood from the fire pit. Thoroughly clean the interior and exterior to ensure a clean surface for the conversion process.
- Inspect the Fire Pit: Carefully inspect the fire pit for any signs of damage or deterioration. Repair any cracks, rust, or other issues that could affect the installation of the gas components.
- Remove the Existing Fire Grate: If your wood-burning fire pit has a grate or other accessories, remove them to make room for the gas burner installation.
Once the fire pit is clean and free of debris, you're ready to proceed with the installation of the gas components.
Step 5: Install the Gas Burner
The installation of the gas burner is a crucial step in converting your wood-burning fire pit to a gas fire pit. Follow these steps to install the burner:
- Position the Burner: Place the gas burner in the center of the fire pit, ensuring that it's level and securely positioned.
- Connect the Gas Supply Line: If you're using natural gas, connect the gas supply line to the burner according to the manufacturer's instructions. Use pipe thread sealant and a wrench to secure the connections.
- Install the Gas Valve: If your burner kit doesn't include a gas valve, install one near the edge of the fire pit for easy access. Attach the gas valve to the supply line and secure it with fittings and wrenches.
- Test for Leaks: Once the gas components are installed, perform a leak test to ensure there are no gas leaks. Apply a gas leak detector solution to all connections and check for bubbles, indicating a leak. If bubbles appear, tighten the connections and retest until no leaks are detected.
- Install the Ignition System: If your gas fire pit includes an ignition system, follow the manufacturer's instructions to install it properly. This may involve mounting the ignition module, wiring the ignition switch, and testing the system to ensure it ignites the burner correctly.
Step 6: Add Fire Pit Media
After the gas burner is installed and tested, it's time to add fire pit media to enhance the appearance and performance of your gas fire pit. Common types of fire pit media include lava rocks, fire glass, ceramic logs, and decorative stones. Choose a media type that complements your outdoor decor and personal preferences.
To add fire pit media, simply spread it evenly over the burner and burner pan, ensuring that it covers the entire surface. Arrange the media to create an appealing aesthetic and distribute heat evenly across the fire pit.
Step 7: Test the Gas Fire Pit
Once the conversion process is complete, it's essential to test your gas fire pit to ensure it operates safely and efficiently. Follow these steps to test the fire pit:
- Turn on the Gas: Gradually open the gas valve to allow fuel to flow to the burner. Listen for the sound of gas flowing and check for any signs of leakage around the connections.
- Ignite the Fire Pit: If your gas fire pit has an ignition system, use the ignition switch or remote control to ignite the burner. If you're using a manual ignition system, use a match or lighter to ignite the flames.
- Monitor Flame Appearance: Observe the appearance of the flames to ensure they're burning evenly and without excessive flickering or sputtering. Adjust the gas flow if necessary to achieve a stable flame.
- Check for Heat Output: Feel the heat radiating from the fire pit to ensure it's producing sufficient warmth for your outdoor space. Make adjustments to the gas flow or fire pit media if the heat output is inadequate.
- Test Safety Features: Verify that the fire pit's safety features, such as flame sensors and thermocouples, are functioning correctly. These features are designed to automatically shut off the gas supply if they detect any issues with the flame or temperature.
- Conduct a Final Inspection: Once the fire pit has been tested, conduct a final inspection of all components to ensure everything is functioning correctly and safely. Address any issues or concerns before using the fire pit regularly.
Step 8: Enjoy Your Gas Fire Pit
With the conversion process complete and your gas fire pit successfully installed and tested, it's time to sit back, relax, and enjoy the warmth and ambiance of your outdoor oasis. Invite friends and family to gather around the fire pit, roast marshmallows, and create lasting memories in the comfort of your backyard.
Maintenance and Safety Tips
To ensure the longevity and safe operation of your gas fire pit, follow these maintenance and safety tips:
- Regular Cleaning: Clean the fire pit regularly to remove debris, dust, and ash buildup. Wipe down the exterior surfaces and clean the burner and fire pit media as needed.
- Inspect Gas Connections: Periodically inspect the gas connections and fittings for signs of wear, corrosion, or leaks. Tighten loose connections and replace damaged components as necessary.
- Test Ignition System: Test the ignition system periodically to ensure it ignites the burner reliably. Replace batteries in electronic ignition systems as needed and clean the ignition components to prevent malfunction.
- Monitor Flames: Keep an eye on the appearance and behavior of the flames while the fire pit is in use. If you notice any irregularities, such as uneven burning or excessive sooting, troubleshoot the issue and make adjustments as needed.
- Maintain Clearance: Ensure that the area around the fire pit is clear of flammable materials, such as dry leaves, branches, or outdoor furniture. Maintain a safe distance between the fire pit and surrounding structures to prevent accidents.
- Professional Inspection: Consider scheduling an annual inspection by a qualified technician to ensure that your gas fire pit is operating safely and efficiently. A professional can identify any potential issues and perform maintenance or repairs as needed.
Converting your wood-burning fire pit to a gas fire pit is a rewarding project that can enhance your outdoor living experience and provide years of enjoyment. By following the steps outlined in this guide and adhering to proper maintenance and safety practices, you can create a safe, efficient, and aesthetically pleasing gas fire pit that will be the centerpiece of your outdoor space. Whether you're hosting a backyard barbecue, enjoying a quiet evening under the stars, or simply unwinding after a long day, your gas fire pit will provide warmth, ambiance, and lasting memories for years to come.